Toolpaths
To 3d print a form we have to create what’s called a toolpath. A toolpath consists of numerical g-code, which is essentially a set of instructions that tells the 3d printer what to do. Fortunately, we don’t have to learn to write g-code because the software writes it for us based on how we arrange things in the graphical interface and the settings we enter. There are two main programs you’ll use for 3d printing in the Makerspace: Simplify3d (for the Makergear and Taz printers), and Preform (for the Formlabs printer). The 3D printing tutorials on the MakerSpace website cover everything you need to know about Preform, and almost everything you need to know about Simplify3d, but let’s go over a few more points that you’ll find helpful when using Simplify3d and the MakerGear printers.
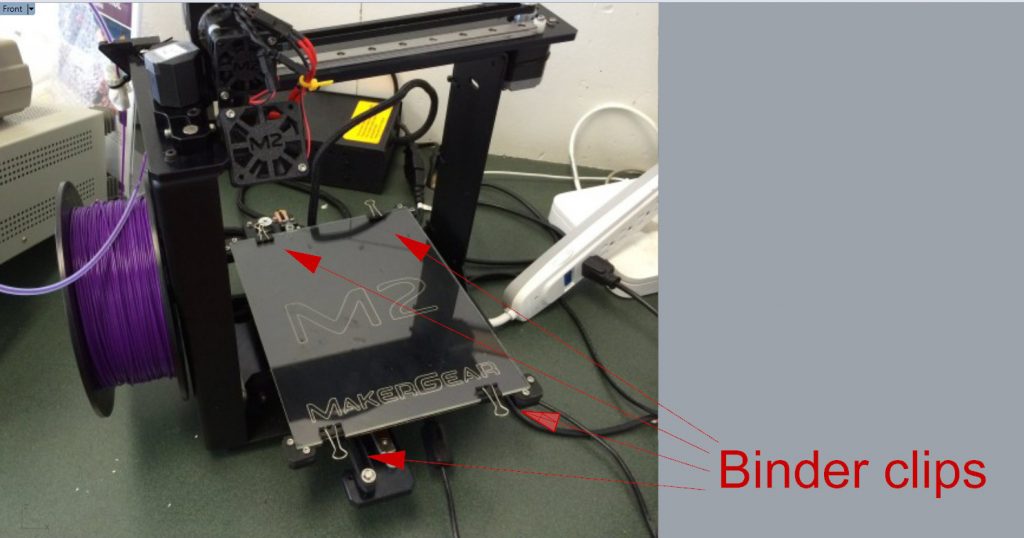
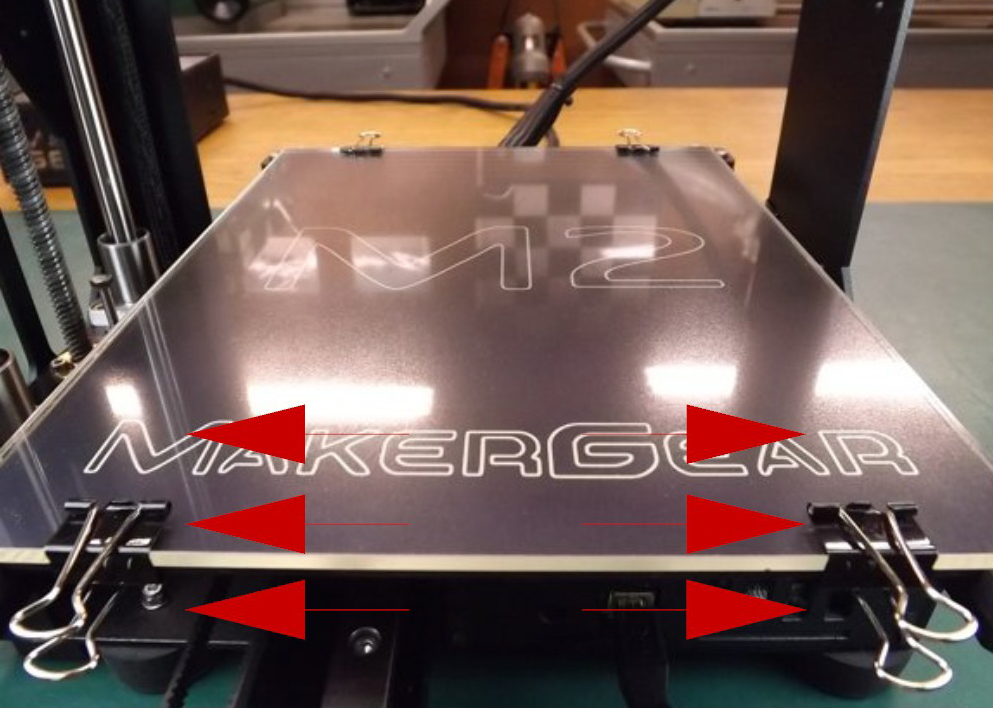
Don’t hit the binder clips! When working with Simplify3D in preparation for printing on a MakerGear, remember that there will be binder clips holding down the print bed. (see below)
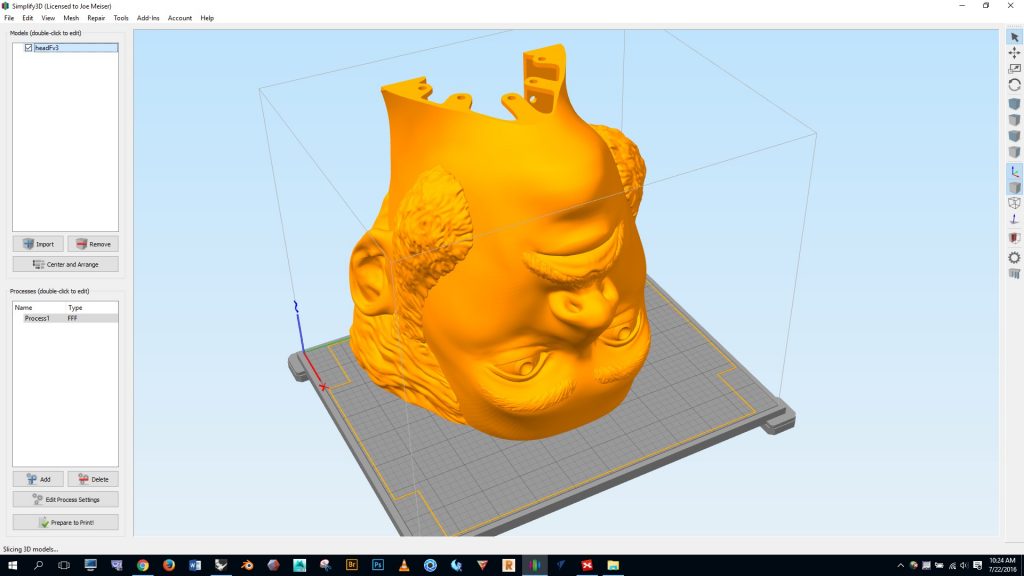
If your toolpath runs the printer’s hotend into the binder clips it will mess up the print job and it may damage the printer. With this in mind, I have created a simple boundary mesh (see below) that I load in with each Simplify3D print job. This boundary mesh constrains the travel movement of the hotend and ensures that it won’t hit the binder clips. If you’d like to use this mesh, here it is as an STL file, and here it is as a Rhino file. I admit that my boundary mesh could probably be scaled down a bit– if you make improvements to it please share them with me and I’ll update these files.
Move the binder clips as far to the left and right as possible. When the print job starts the binder clips will be dreadfully close to some bolts at the top of the machine. Putting the clips to the far left and right will keep the clips from running into the bolts.
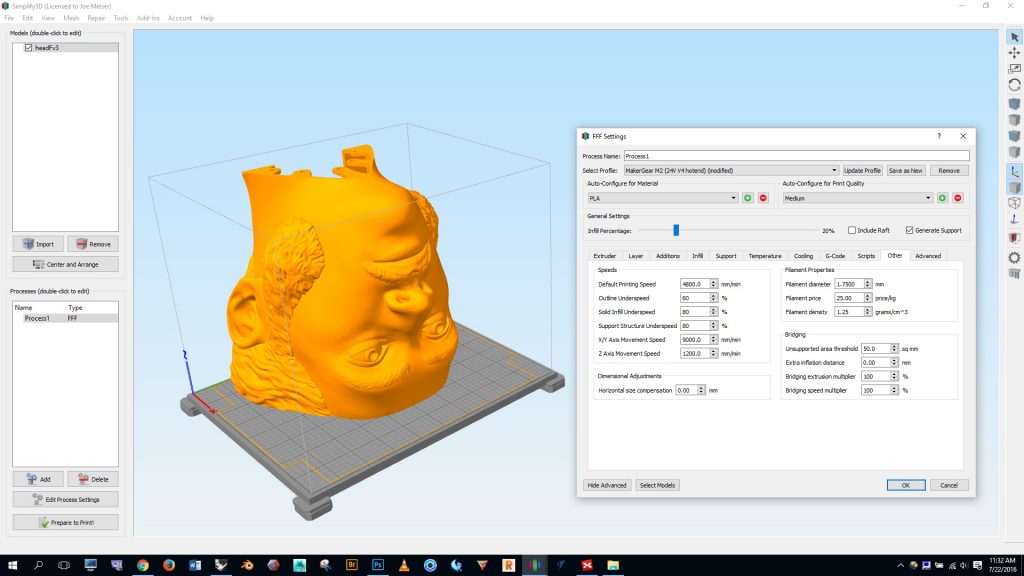
Lower the movement speed when printing large or tall parts. When printing a large part using the printer’s highest movement speed, the printer may get out of alignment in the Y axis. This is because large parts have significant mass, and as the bed jerks back and forth the inertia can cause the printer to exceed its intended path. Tall parts, on the other hand, are susceptible to detaching from the print bed when the bed movement is jerky. If you look in the “other” panel of the process settings you’ll see the box where you can adjust the x/y axis movement speed. By default the movement speed will be set to 18,000 mm/min. I have found 9,000 to work to work well with large and tall part on the Makergear printers.
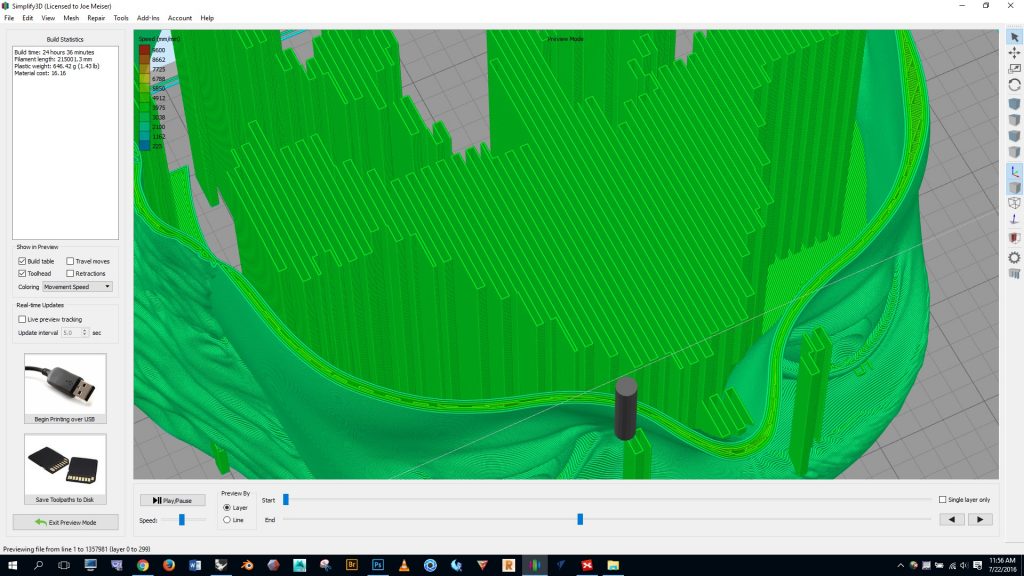
Carefully inspect the toolpath before printing. After you’ve entered all of your settings and you’ve clicked the “prepare to print” button, take a few minutes to examine the toolpath. This can save you from running a failed or substandard print job, so it is worth the time.
While looking at the print preview, ask yourself:
- Is there enough support in areas that need it?
- Is the resolution of the print sufficient?
- Are there any holes in the model from boolean processes gone wrong?
- Check the travel moves — does it look like the hotend will run into the binder clips?
- Examine the lowest layer — does it look like the print will make consistent contact with the printer bed?
- What will it be like to remove the support material and cleanup the print? Is the support material going to obscure areas of high detail that will be hard to cleanup? If so, should you make adjustments to the print setup to make the cleanup process easier?
- Is the build time acceptable? The longer a job runs, the more likely it is to fail. Also, keep in mind that Simplify3d tends to underestimate the time required. Add 25% to get a realistic estimate. If you’re dealing with multiple parts it may be better to run a few separate small jobs than one big job.
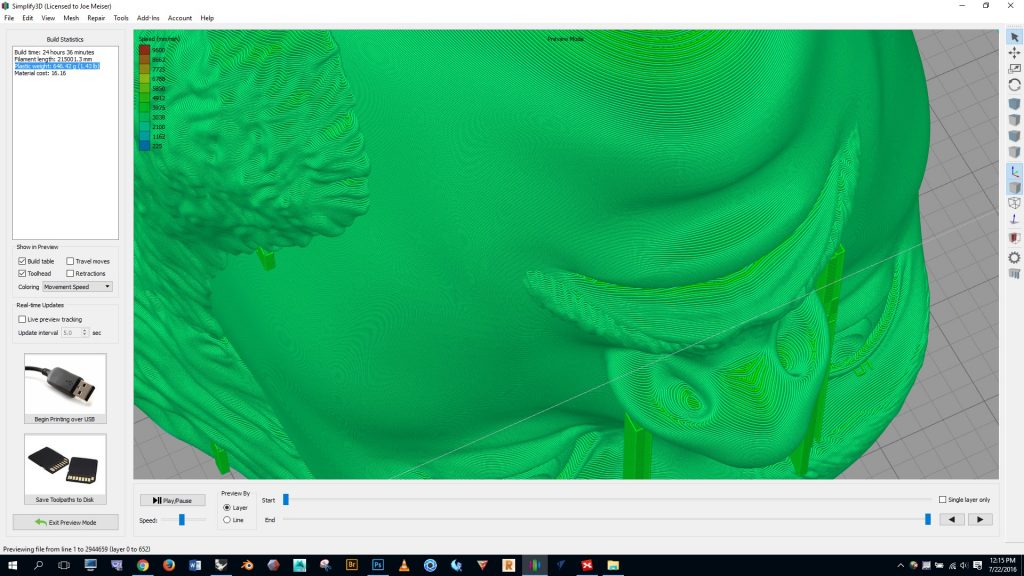
Make a note of the plastic weight. Knowing the plastic weight (highlighted in blue below) will enable you to accurately gauge whether there is enough filament on the spool to complete your job.
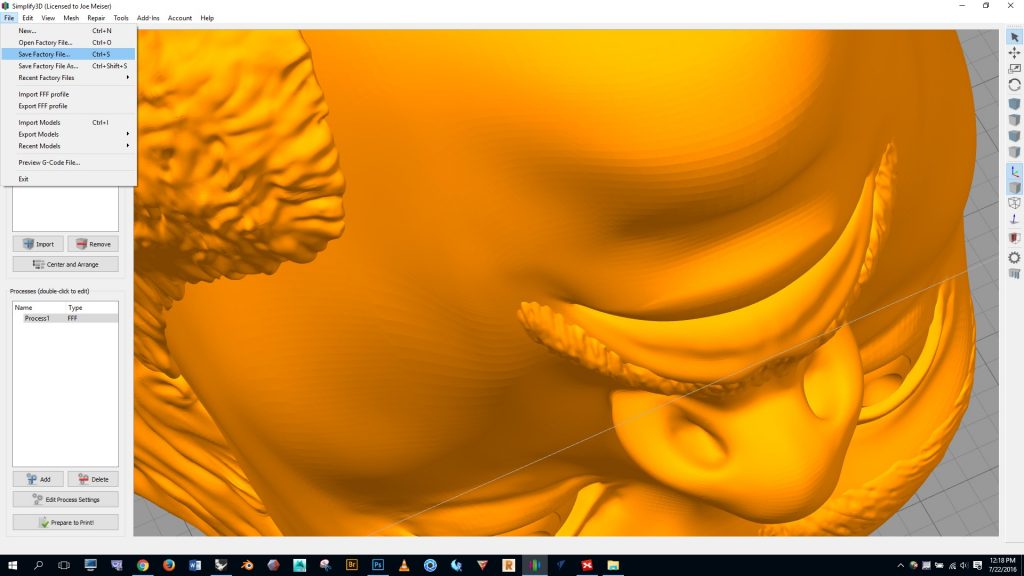
Save the factory file. The factory file includes the geometry of your project and all of the process settings you’ve created. It’s helpful to have this file in case your job fails and you need to make an adjustment prior to reprinting.
