Even if your NURBS form is a single watertight solid there’s still a chance it will produce a mesh with errors. Errors in the mesh can cause problems during the printing process. Let’s look at how to check for errors and how to repair them.
Mesh repair in Rhino
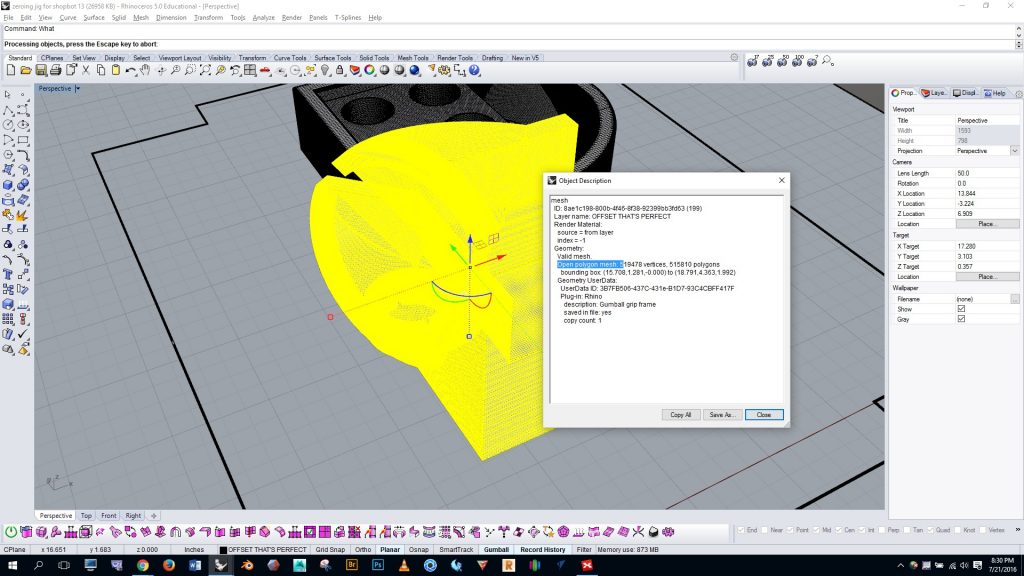
In the example below the original NURBS polysurface was a closed solid, but by running the “what” command we see that it produced an open polygon mesh.
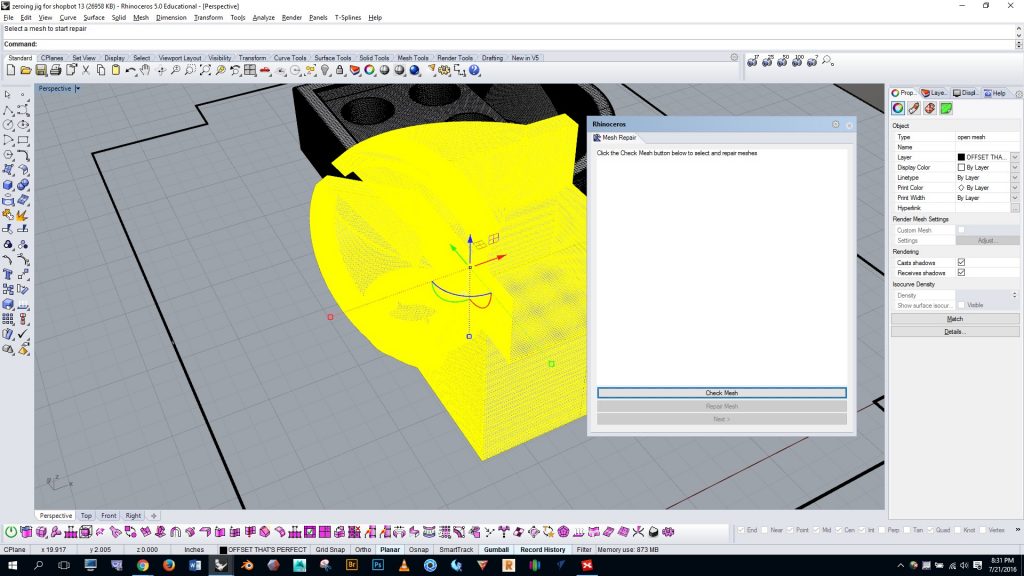
Let’s run the “meshrepair” command (shown below) and click the “check mesh” button at the bottom.
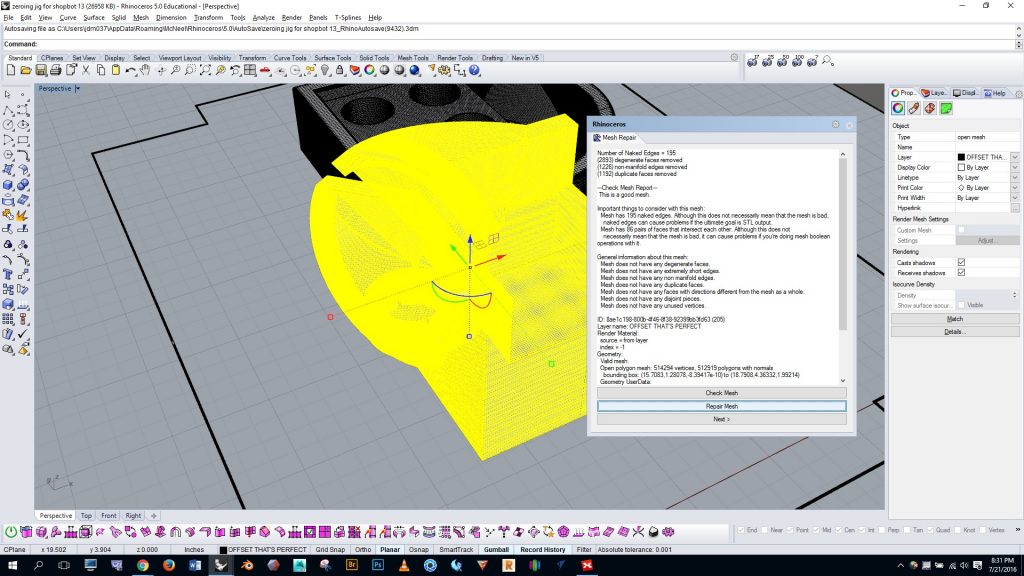
We see that we have a bad mesh with degenerate faces, non-manifold edges, and lots of duplicate faces. Let’s click the “repair mesh” button.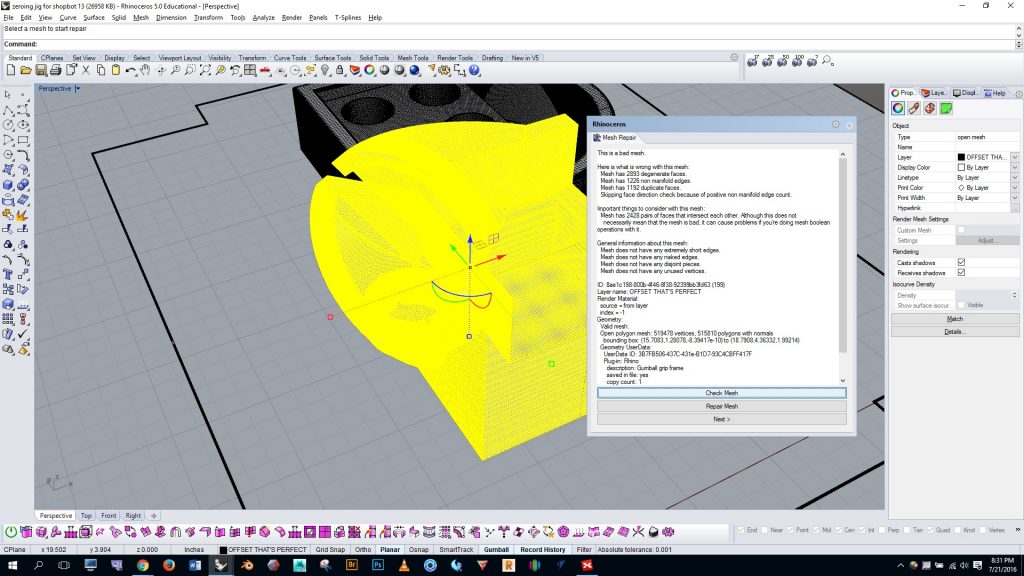
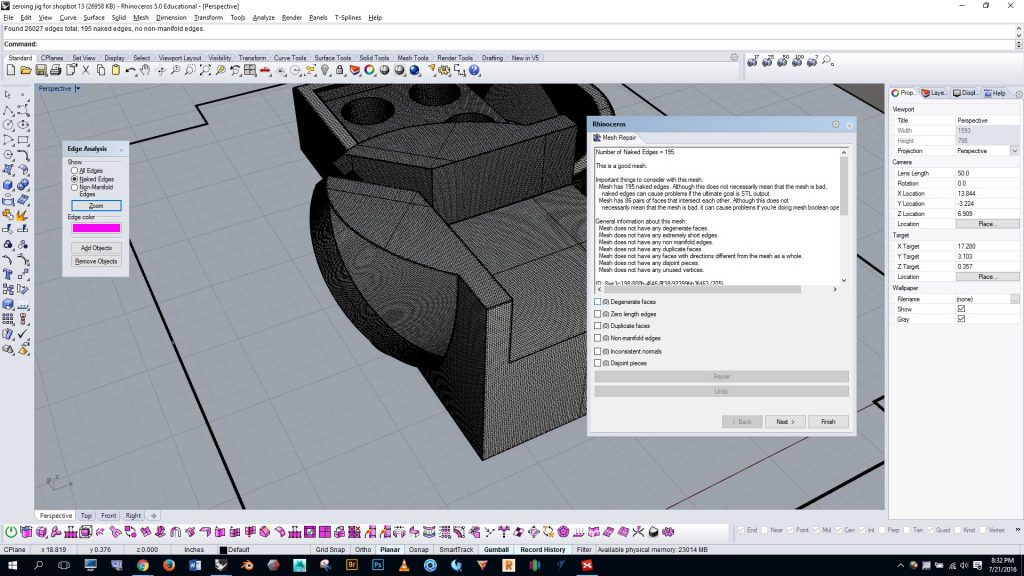
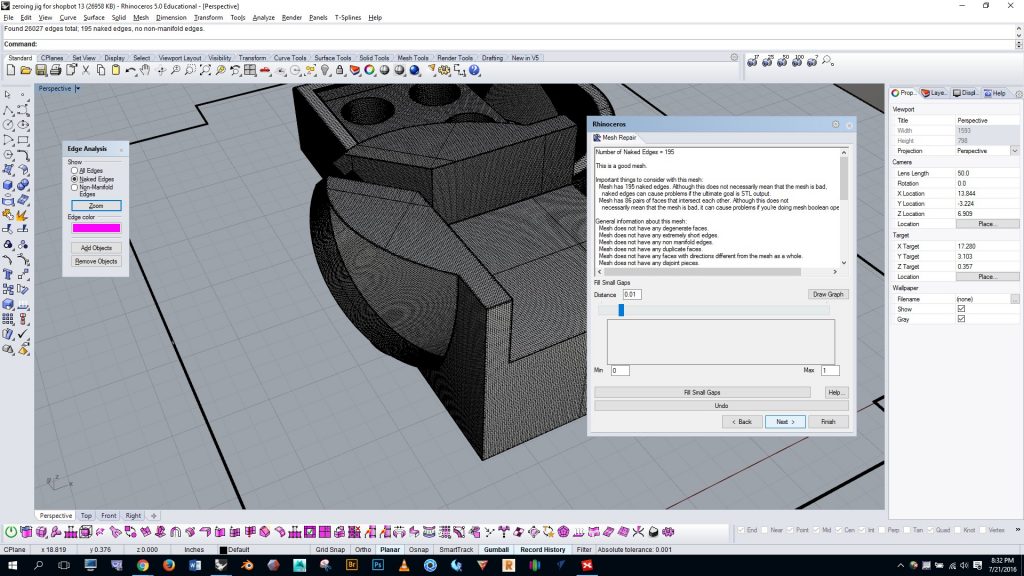
And we see that the degenerate faces, non-manifold faces, and duplicate faces are removed. But looking further down the list we can see that there are still many naked edges. Let’s click on the next button…
If there were remaining issues with degenerate faces, etc. we would have the opportunity to fix them on this screen. Sometimes when we fix one problem it creates other problems, so you may have to run the repair several times in a row on different problems to resolve everything. Now let’s fix the naked edges…
Naked edges on a mesh are often due to small gaps. By adjusting the value in the distance box and clicking the “fill small gaps” button we may be able to close the naked edges.
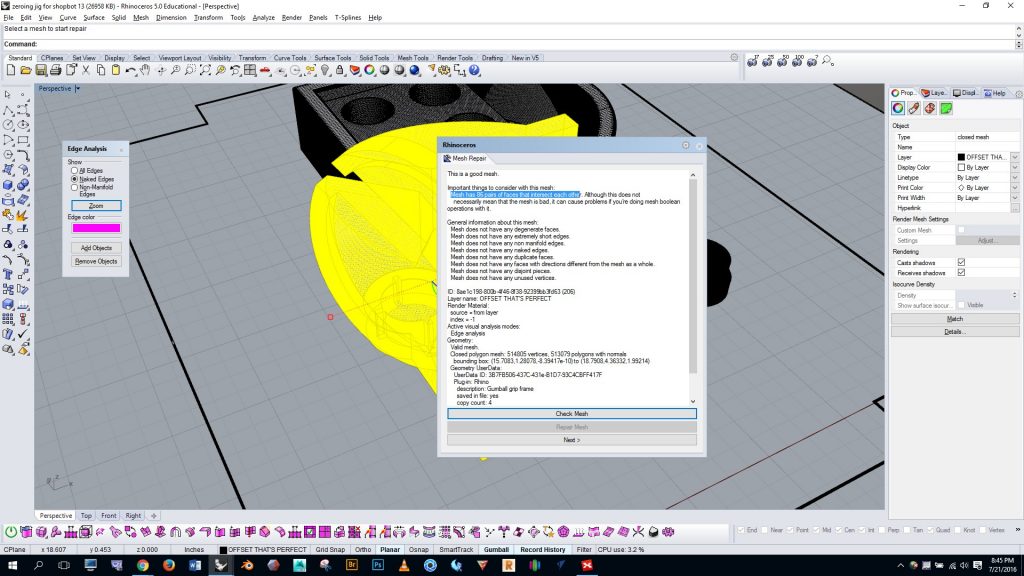
We see that the naked edges have been fixed and we now have a good mesh, but the part still has “86 pairs of faces that intersect each other”. At this point, since we now have a good mesh, we could go ahead and export the mesh and create the printing toolpath. It would be wise, however, to carefully inspect the toolpath in case the intersecting faces cause any problems. We’ll look at toolpath inspection on the next page.
Mesh repair in netfabb
For the sake of demonstration let’s look at another program that can help resolve mesh errors. Let’s export the part as an STL and open netfabb basic — this is a free program that you can download from here.
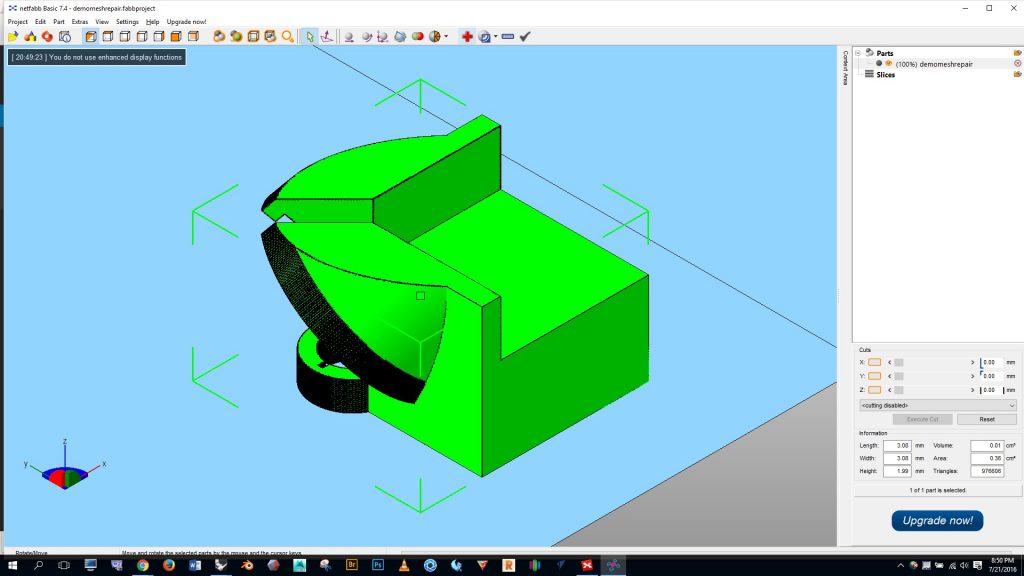
Open netfabb and go to “project”, “add part”, and select your part. Once your part opens click on your part to turn it green and then click the red plus button at the top of the screen, as shown below.
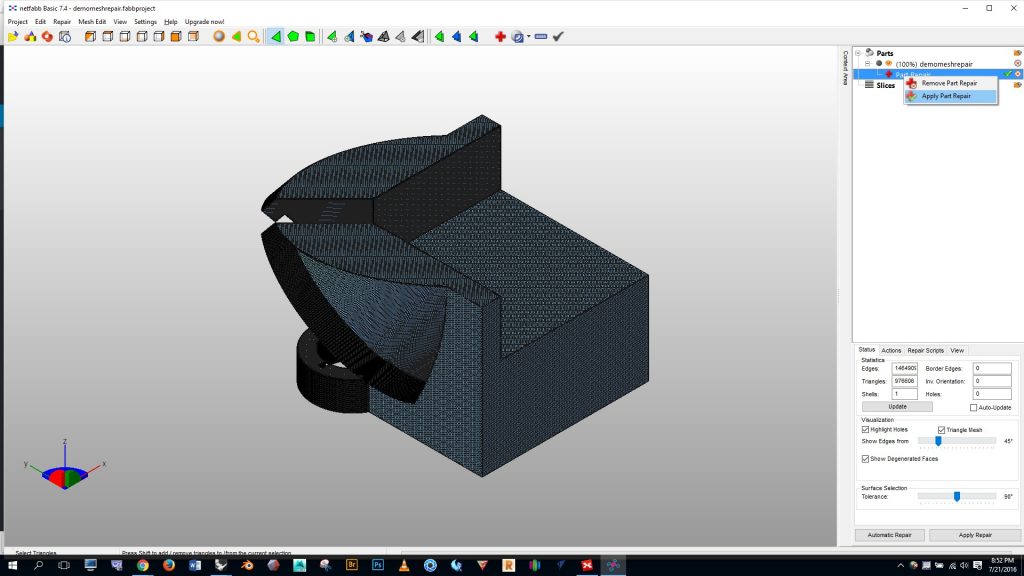
Now look over at the top right of the screen. Right click on “part repair”, click on “apply part repair”, and then choose to remove the old part.
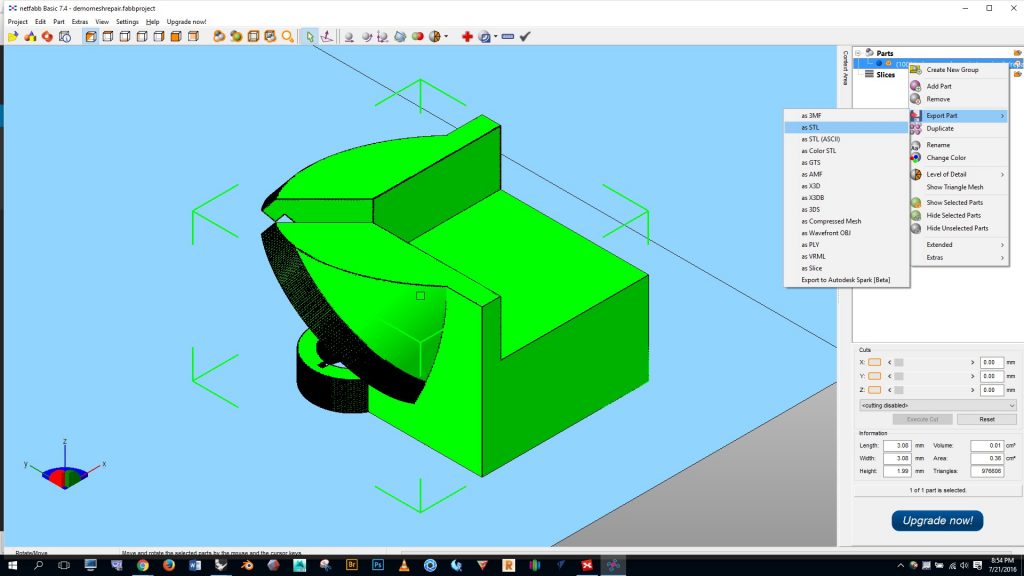
Finally, again in the top right, right click on your part in the part list, select “export part”, and export as an STL file. Choose to optimize the part, and then export it. The errors should be repaired– check the part in Rhino to be sure.
Make solid in MeshMixer
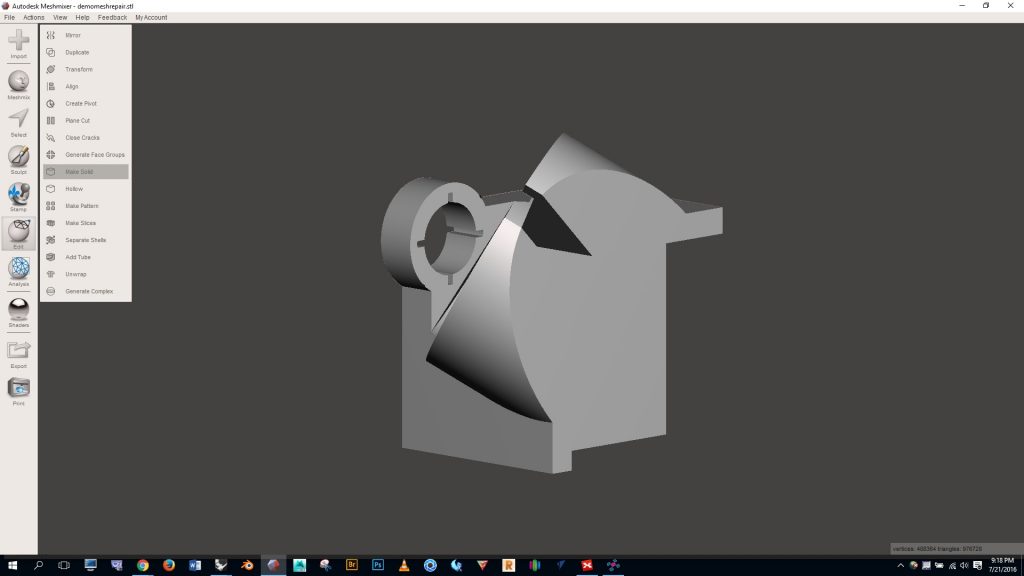
Meshmixer can also be used to fix mesh errors. Meshmixer’s make solid function may reduce the density of your mesh, so proceed cautiously. Once you open Mixermixer and import your file, click on “edit” (on the left), then “make solid”, as shown below.
By the way, notice below that Meshmixer rotated my part on import. You can keep this from happening by clicking on “file” > “preferences” > “file” > and then check the “flip Z-Y axis on import export” box
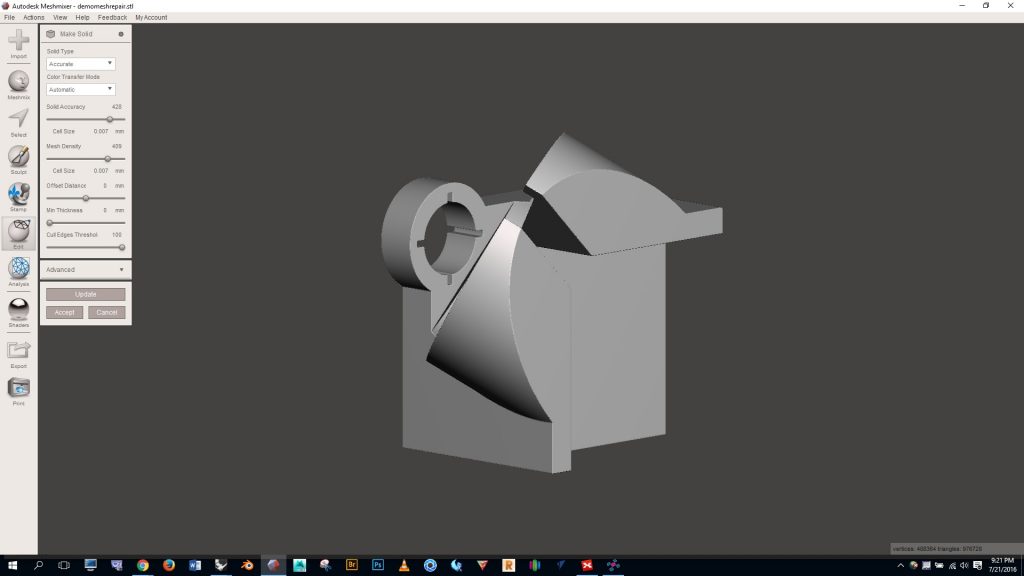
When running the make solid command I usually use the “accurate” solid type, and I set the “solid accuracy” and “mesh density” sliders up pretty high to preserve mesh density. You can tinker with the settings and click “update” to see what the result will be. When you’re happy with the settings click “accept”. This process will probably resolve the mesh errors — take the form back into Rhino to check.
[return to 3D Printing Guide main page]
